Archive
Momentisa app (Product Review)
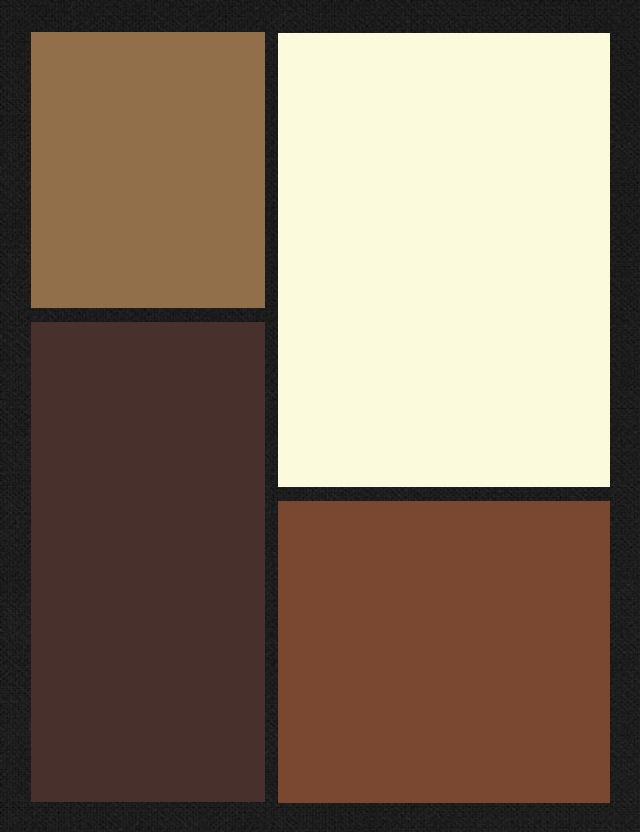
Figure 1
Momentsia
madbits, LLC.
Free
iPhoneography effect app
I am an avid freelance, semi-pro photographer and as such, I really enjoy all types of photography from the very lowest common denominator of point-and-shoot film cameras all the way up to my fancy shmancy digital SLR (Canon T3). I’m equally intrigued by iPhoneography. I like the instant effects I can get with different apps that mimic, almost imperfect pixel by imperfect pixel, the effects I get with film and cross processing. I’m also a big fan of art, especially the various schools of modern art or what I call modern art–from the post Impressionists through the Bauhaus movement all the way up to what’s popularly known as Post-modernism*.
The Momentsia app gives you sort of a Modrian type effect in multiple collage type frames. See Figure 1 for an example.
The app is very simple to use. See steps below. Once you open the app and select the frame style that you want from the dozens of options, then tap a frame to take a picture with your phone’s camera to send to that frame. Repeat for the other frames.
Using Momentsia
- Select a layout.
- Capture or select a picture.
- Save or share.
If you’d like to add any shots from one of your albums, then tap and hold to bring up your album options. Select a photo for the selected frame and continue until your frames are filled. You can also use your front or rear facing camera with this app to get yourself into the action.

Figure 2: Mannequin collage
You can perform some minor manipulation like zoom in, zoom out and pan on your photos, which can give you some more interesting effects even with the same photo. See Figure 2 as an example.
The photo in Figure 2 is the same mannequin picture used for each frame. I zoomed in on the face for the lower left frame. The upper frame is a zoom and pan. The lower right frame is the original photo as it landed into that frame.
You can change the frame arrangement after your photos are in place if you want by tapping the design icon. Your photos will stay in the buffer. You can add, remove, take new shots and rearrange your pictures an infinite number of times.
Once you’ve completed your new masterpiece, you can save it to your Camera Roll, email it to a friend, post it to Instagram, attach to a tweet or post on your Facebook page.
The app is easy to use, versatile, offers lots of options and does what it says it does: creates collages.
Momentsia is free but I think if madbits wanted to monetize this app, they could for a cool 99 cents. I don’t think many people would pay more for it and it’s totally worth a buck for all you can do with it.
One thing to note about this app: the colors you see in the design preview have nothing to do with the actual colors in the end product. I’m not exactly sure why there are different colors, since they have no apparent effect on your photos.
In all, Momentsia is fun to use and is a great little app to have for you iPhoneographers out there who want something a little different to play with. I say, “Get it.” Why not, it’s free so if you hate it, you can delete it without a moments (Yes, that’s a slight attempt at a pun) remorse.
I give Momentsia a 7 out of 10 because there are few options and I can’t figure out how to get color tinting, if it’s even an option, for my frames. It’s a “good enough” app for a collage special effect but don’t expect spectacular and you won’t be disappointed. Hey, it’s free, after all.
Review: 7/10
*In today’s terms, Post-modernism would no doubt have the name Modernism 2.0.
mymosaic App (Product Review)

mymosaic’s Opening Screen
mymosaic App
MindTrip Studios, LLC.
iPhone, iPod and iPad compatible.
$0.99 from the Apple Store
Facebook Page
@mymosaicapp
Since I was a kid, I’ve wanted to make photo mosaics but never had the patience to copy, cut, paste, arrange, repeat. Making mosaic pictures back then is kind of like shooting stop motion videos: the result is so cool but the process is so painful. Well, technology finally caught up with my hedonism/laziness/lack of patience in the form of an iGadget app. Currently, the mymosaic app is only available for Apple products. And for 99 cents, you can’t beat the price.
The two best places to see examples of mymosaic and the creative possibilities are on the mymosaic Facebook page and on the mymosaicapp Twitter feed. There are some OMG photos on there. But don’t be intimidated by them because you too can produce such images with your photos in minutes. Seriously.
You can save your finished mosaics in a variety of sizes while it’s still in the buffer. See the size chart below:
- Mobile – Optimized size for mobile to mobile viewing.
- Small – 10″x10″
- Medium – 20″x20″
- Large – 30″x30″
The Large size gives you the opportunity to save your mosaic in poster size without losing detail.
There’s only one problem with the mymosaic app and I hope MindTrip fixes it because, for me, it’s a major problem. You can only select an entire album instead of individual pictures to create your mosaics. You’ll see what I mean during the following mosaic creation tutorial.
Mosaic creation

Take new photo or select from an album
When you create a new mosaic, either you can take a new photo for the main picture or select one from one of your albums. That part is fine. Step two is to adjust the mosaic options such as number of tiles, color shift, variety, tile consolidation, framed pictures and tile source.
When you select tile source, you’re only given the option of selecting entire albums. I want to be able to select individual pictures for the tiles. What if I want to create a mosaic of my daughter that’s composed of a picture of me and a picture of my wife (Get it?)? I would have to empty out my Camera Roll or create a new album and copy the two pictures into it that I want to use. Both options are kind of a pain.
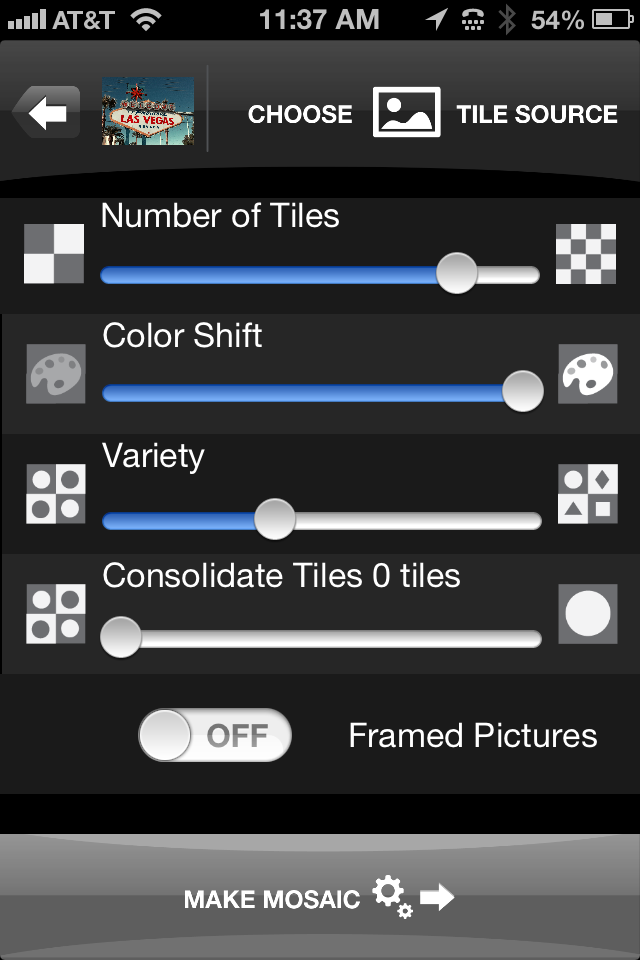
mymosaic’s Option Screen
Once you’ve selected your album, you tap Done to return to the options page and tap Make Mosaic. Your finished mosaic appears ready for you to save to your Camera Roll or to share on Twitter, Tumblr, Facebook or Flickr.
If you don’t like the way your mosaic looks, you can tap the back arrow and adjust your options and recreate the mosaic by tapping Make Mosaic again. You don’t have to recreate it from scratch, since the app holds your source photo and album in a buffer.
You won’t lose the mosaic you’re working on unless you return to the main screen where you select to take a new picture or select one from an album.
The mymosaic app is easy to use and a lot of fun to experiment with. I’ve sent some of my mosaics to Wal-Mart‘s photo lab to be printed and they look very cool. It’s a great way to see your handiwork in a short period of time, since most cities have a Wal-Mart with a short turn-around time photo lab. You can load your pictures into their website and pick up your printed pictures in about two hours.
I really like mymosaic. It’s the app I’ve looked for to create the effect that I’ve longed for: photo mosaics. Below, you can see a mosaic that I quickly created during the writing of this review. The original is a store mannequin that I shot while in Las Vegas at a conference. I took the picture with the Old Camera App and I think it looks quite cool. Click on the photos to see them in full size.
You can mix and match your mosaics too. You can use a source B&W photo and use color photos to create the mosaic or vice versa. The colors will be muted but the effect is still very intriguing.
Have fun with mymosaic. I highly recommend that you buy this app if you want to experiment with mosaics. It’s the most creative fun you can have for 99 cents.
Review rating: 8/10

Original mannequin shot in black and white.
Mosaic using original photo as tile source.
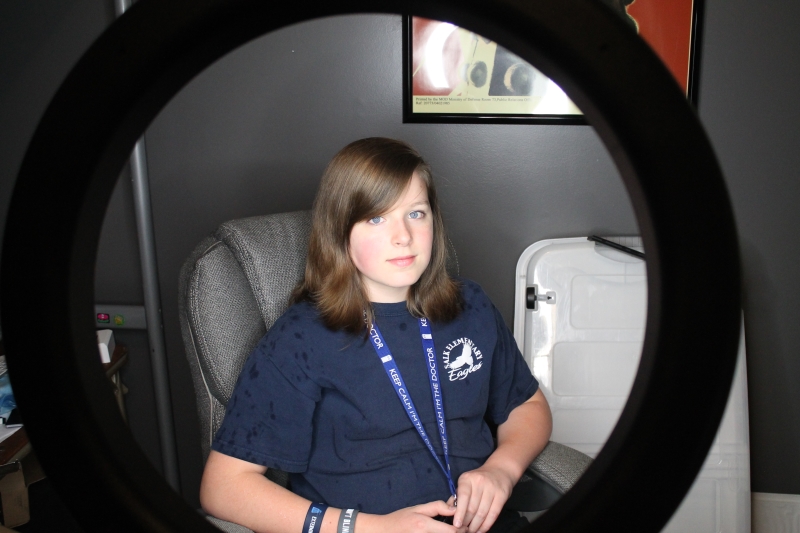
Flashpoint 14″ Fluorescent Dimmable Ring Light (Product Review)
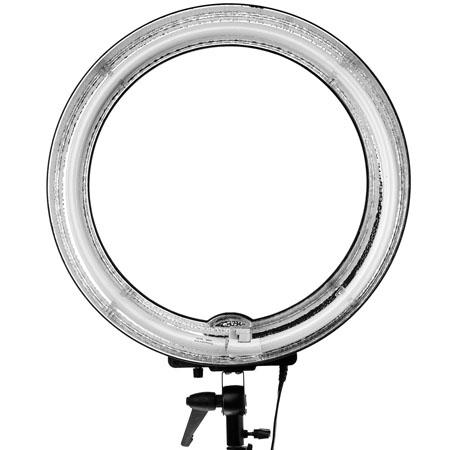
Front view showing reflective outer ring and adjustable pitch clamp.
Flashpoint 14″ Fluorescent Dimmable Ring Light Adorama Camera, Inc. Retail: $139.95 Adorama: $124.95 5500K 80W Bulb replacement $15.95 As an avid film and digital photographer, I know that lighting is very important. There are times when flash units just won’t do the trick. Portraits, products, stop motion video, movies and many more applications require a constant, shadow free light source. Light is everything to the camera. It is your palette and your paintbrush. The Flashpoint 14″ Fluorescent Dimmable Ring Light from Adorama is a well-built, carefully thought out piece of photographic equipment. It’s hard not to be excited when you light up your subject with it. The perfect white light, the even tones and no shadowing or weird color shifts are what photographers and filmmakers long for in their quest to create their masterpieces.
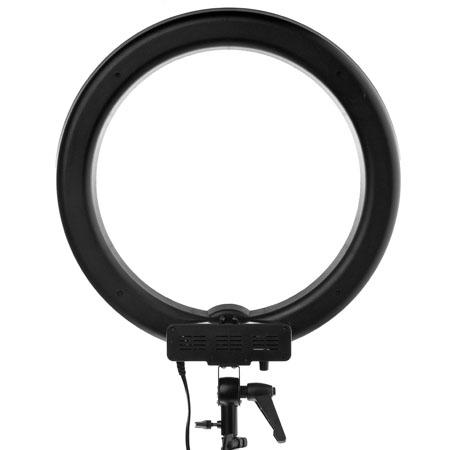
Rear view of the light fixture showing the adjustable clamp, the light stand clamp and power cable.
The light has an adjustable dimmer/brightener on it so that you can modulate the amount of light bathing your subject. The light is very bright but not blinding to your human subjects, although they will appreciate the ability to dim and diffuse the light a bit when you place the ring close. The ring light allows you to take photographs or film through the loop or from the side. The unit as described does not ship with a light stand. For this review, I used my own ProMaster Basic LS-1, which worked perfectly with the ring light. The ring light fixture is lightweight enough to be very mobile but sturdy enough to remain still in light breezes outdoors. For inexpensive studio lighting, I don’t think you can do much better than this light setup. I love it. From still portraiture, to product photography, to videography, this is one accessory that you need to add to your list. It comes with its own thick, padded nylon carrying case and a velcro-attachable diffuser. Below you can see two photographs I made with the ring light of my daughter. No Photoshop adjustments have been made to these photos. They’ve been resized to fit better into the space here but size adjustment is the only one made.

Cropped photo through the ring light.
These photographs were taken with my Canon T3, auto focus, no flash setting. Note the bright but soft lighting effect with this ring light. The first photo is unretouched except for cropping to remove background details. It was taken through the ring light. If you look carefully, you can see the ring light in her eyes.
Uncropped photo through the rear of the ring light.
The positional clamp on the light allows you to use a variety of angles so that you can not only position your light distance-wise but also from above, below or straight on. For these photographs, I positioned the light slightly above the subject’s eyeline.
I’m impressed with the overall quality of light, adjustability and flexibility of this ring light. I find no flaws in its workmanship or use. I really enjoyed working with this lighting unit and I think that it’s a worthwhile, yet small, investment if you even slightly serious about photography or videography. I highly recommend this product. The price is good, the replacement bulb price is excellent and you receive free shipping on this product from Adorama. What more could you want?
Review: 10/10
Stay tuned for an upcoming review of iStopMotion Pro and a stop motion video that I’m making using this light.
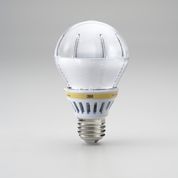
3M LED Advanced Light (Product Review)
 3M LED Advanced Light
3M
Dimmable, LED Light Bulb
60W Equivalent, 13W actual usage
Lifetime: Up to 25 years.
Retails at Wal-Mart for $24.88
The light emitting diode (LED) has been around for a long time (50-ish years or so) but their expense has always put off their use for mass consumption. Like all good technology, the price has come down to a near palatable level in recent years. You can find LEDs in Christmas lights, car headlights, taillights, interior lights, flashlights and just about anywhere you need light.
The final frontier has been home lighting due largely to the high price. Now, 3M has manufactured an affordable LED lamp that not only outshines (Sorry about that) its competition but it also outlasts them by many years and contains no harmful elements.
I’m the guy who ran through his house and replaced every incandescent bulb (traditional light bulbs) with compact fluorescent lamps (CFLs) in 2006 or 2007, when they became cheap enough to use on a larger scale. I have far too many multi-bulb ceiling fans to spend a huge amount of money on new bulbs all at once. CFLs last three to four years, even in ceiling fans*.
The problem with CFLs is that they contain about 4mg of the poisonous element mercury (Hg). That’s really a very small amount and a very small problem if the mercury is reclaimed through recycling.
I don’t like incandescent light bulbs because of the amount of heat they give off. It’s actually kind of scary, when you think about it. That heat also accounts for the short life of the incandescent style bulb. CFLs are much cooler and more energy efficient. Still, they aren’t cool or efficient enough.
LEDs give off almost no heat even after extended use. CFLs are still too hot to touch while lit. The 3M Advanced Light is an interesting product. It’s brightness is constant from switch on to switch off. CFLs get brighter after a few minutes of being on and get dim over time as they age. CFLs also burn out oddly and I think dangerously by burning out in part of the casing.
I changed out my CFL office light with the 3M Advanced Light and have been very pleased. The light is brighter and whiter than the yellowish CFL and I’m not sure I could go back to that odd yellow glow now that I have seen the light (Sorry again).
The 3M Advanced Light is also dimmable whereas most CFLs are not. I have dimmers in my house and that’s a major CFL fail.
The only downside to the 3M Advanced Light is the price. At $25 per bulb, I would have to space out my conversion but would gladly do so if I had a guarantee of at ten years of life from each bulb. I expect the price to come down some over the next couple of years to a more comfortable level, say in the $10 to $15 range. I’d be more than happy to convert my house to them.
One minor thing about the LED bulb is that it’s heavy. It feels like it might weigh close to one pound, which is heavy for a light bulb. I don’t carry many around with me but it’s just something that I noticed.
The one single thing to note about these bulbs is that they’re manufactured by 3M in the United States (Minnesota) and most of its components are also made in the USA. On that fact alone, I’d say that this product is a must buy. In addition to making a great purchase of an excellent product, you’re also helping keep 3M’s manufacturing in the US. A fact that cannot go unnoticed. $25 per bulb is chicken feed (cheap, cheap) (Sorry, I keep doing that), when you consider the economic impact.
 The key points to this product are:
- Made in the USA.
- Contains no mercury.
- Gives of very little heat.
- Lasts up to 25 years.
- 3M quality.
- Dimmable.
- Comes in two colors (Warm and Cool)
- 40W and 60W equivalents.
The only point of this product that keeps it from being a 10/10 is price. I love this product and I highly recommend that you try one to start with and then see what you think.
Review: 9/10
*Ceiling fans have vibration associated with them which seems to shorten the life of bulbs.
NOTE: You cannot install this bulb in a fully enclosed fixture. It requires an opening for heat management. See the FAQs.
The Nokia Lumia 920 Windows Phone (Review)
 Model: Nokia Lumia 920
Carrier: AT&T
Operating System: Windows Phone 8.0
(8.0.10211.204)
Screen Resolution: 768×1280
Full Specifications
The Nokia Lumia 920 is a large-screened (4.5″) smart phone. It’s larger and heavier than standard smart phones. Oddly, it doesn’t feel too cumbersome but I do notice its presence more in my pocket compared to my personal iPhone 4. I would definitely know if I lost it or if someone picked my pocket.
Windows 8 adopters will love the Windows 8 style interface. The live tiles work exactly the same on the phone as they do in the tablet or on a laptop. Of course, you have the obligatory swipe and tap interface that you’ve come to know through smart phone technology.
Navigation is easy if you’re used to smartphones or Windows 8. If you’re switching from an older Windows phone, from Android or from an iPhone, you might experience a little trouble. The Windows 8 interface is nothing like Apple’s iOS, regular Windows phones or Android phones. It’s as different as Windows 8 is from anything previous to it.
However, if you give it a chance, this interface works great on a phone. The tiles are large, so that you will rarely tap the wrong one. The phone that I reviewed worked without hesitation or lag. You can multitask on it, even during a phone call, so if your significant other calls you and asks you to look up a recipe, a phone number or search for a location, you can do that while speaking.
I attempted to pair the phone with my Apple Wireless Keyboard via Bluetooth and the phone “saw” the keyboard, prompted me for the keyboard PIN and the phone PIN but for some reason, I could never connect them. I’m sure it’s my fault and not the phone.
The phone did not find the Rocksteady XS Bluetooth Speaker that I recently reviewed. That’s a disappointment. It never found it while scanning. The phone did find my two Roku devices, my iPhone and my daughter’s friend’s Samsung phone.
The Wi-Fi connectivity is excellent and seems to have a long range. I could still connect to my home Wi-Fi from outside with no lag or hesitation, which is something I can’t do with my iPhone, which has a very limited range.
Now, for the really cool part, the phone’s camera. I know, it’s weird to say it but I love the camera. If you know my writings at all, you know I’m a photographer who’s crazy for cameras, camera apps and funky effects.
 For example, here’s a photo of my mouse, mouse pad and St. Patrick’s Day refreshment as I’m writing this review. Yes, that’s a wireless mouse and a SouthPark mouse pad. And of course, my Guinness Extra Stout*. Don’t judge me.
Notice the clarity and good depth of field, though the bottle was less than two feet away from the lens. For us Lomographers, the camera alone might be worth it. The most impressive part of this photo is that the camera used flash but didn’t “blow out” the bottle nor does my computer screen look lightning white in the background. I’m very impressed with the quality of the camera, lens and flash. The same quality of photograph might have taken me several shots to get all of the balance I got on this one the first time.
The Nokia Lumia 920 is a fun phone to use and was named Engadget’s smart phone of the year. Impressive.
The one feature that many reviewers fail to mention is how to take a screenshot with the phone. That’s not a camera shot, it’s a screen shot of whatever you can see on your screen. On some phones, it’s a very awkward, three-handed task to perform. On the Lumia 920, it’s easy–my 11-year-old daughter showed me how.
Press the Home button and the Power button as the same time. If you successfully took the screenshot, your phone will make an old-fashioned camera shutter sound. You won’t find your screenshots in your Camera Roll, though. They’re saved under Photos->Albums->Screenshots.
You can send your screenshots or photos to your SkyDrive account with a tap. You can also share your masterpieces on various social networking sites, if you dare.
Charging the phone only takes a couple of hours, even when you’re down under 20 percent. My daughter wanted to test the phone but it was low on power, so I plugged it in and it only took about 2.5 hours to fill it up to 100 percent, where it still is hours later–after her playing, I mean testing, and my working with various aspects of the phone.
Mind you, this wasn’t a few hours review. I have lived with this phone for about two weeks and feel that I’ve put it through its paces. I’ve charged it several times, run it nearly out of power, taken photos, uploaded to my SkyDrive account, worked with Internet Explorer, updated apps from the Microsoft Store, installed apps from the Microsoft store, opened almost every app and setting on the phone and made a few phone calls. It is a phone after all, so I felt obliged. Don’t worry, Nokia, no international or toll calls.
As for price, I can’t narrow it down for you. I’ve seen prices from $19.99 up to over $600, so my best advice is to shop around for the best contract and phone price combination.
So, you’re probably wondering what I think of the phone that grabbed Engadget’s coveted Smart Phone of the Year award. Well, I like the phone but maybe less than Engadget did.
What I liked:
I like the Windows 8 interface but that’s really not an aspect of the phone per se. As for the functionality of the hardware, I like the range of the bluetooth and of the Wi-Fi. They are both high-powered and very stable. I love the camera with its 8.7MP Carl Zeiss Tessar lens, which I’d never be able to afford on a standard DSLR or SLR.
Power consumption is very good under the harshest use conditions and power up time is incredible. Power management on this phone is probably the best I’ve ever seen on any smart phone.
What I didn’t like:
The size and weight. Sorry, it’s just too big. It doesn’t fit into my pants pocket very easily. During the cooler days, it’s fine in my coat but I’m always aware of its presence. To me, phone gadgets should be small so this one doesn’t fit well for me in that category.
Hipsters will have to wear cargo pants or cargo shorts to carry this one around. Skinny jeans just wont’ do it, so maybe this isn’t the phone for hipsters. And due to the size and weight, vegans might need to have the occasional cheeseburger to lug it around.
Overall, I like the Nokia Lumia 920. It’s hard not to like it. It’s a solid phone with a lot of good features despite its size and weight.
Rating: 8.5/10.
Recommendation: Get it, enjoy it but buy a trailer to haul it around.
*I also had my wife’s excellent corned beef with cabbage today too.
The Rocksteady XS Bluetooth Speaker: A Modern Take on the Boombox of Yesteryear (review)

Rocksteady XS bluetooth portable speaker.
Killer Concepts, LLC.
$89.99
Killer Concepts, LLC., introduces a new portable, bluetooth speaker that will blow you away: the Rocksteady XS. This little black box is the best and loudest bluetooth speaker that I’ve ever seen. The unit has a simple design, a tough construction, speakers that have a near-deafening upper end and a range that will knock your socks off.
OK, I’m not much of an audiophile and I’m often annoyed by people who obsess over music gadgetry. From high priced direct drive turntables and super woofers to boomboxes and ghetto blasters to Sony’s Walkman products to MP3 players to smart phones, I’ve always found them to be rude, offensive and irritating–just like their owners. That said, since I’ve begun working out daily at the local YMCA again, I find myself taking my iPhone and earbuds to assist me on my quest for the perfect physique. I’ve become what I used to hate, an audiophile, or at least an irritating facsimile of one.
I digress.
The Rocksteady XS arrives with a USB cable, a charger interface, a small instruction booklet and itself. You don’t need anything else.
Just larger than a Nintendo Wii remote, it measures approximately 6.5″ long and is just under 2″ on all four sides. It’s very lightweight–a half pound maybe? On one side is the power button, Line In jack, DC-5V interface and a USB 3.0 interface. On another side is your battery access panel. On another face, you have the primary music controls: Play/Pause/Stop, Volume controls and next/previous track. There is also a Mode button that, when pushed, pairs your Rocksteady XS speakers with your bluetooth capable device.
Operation is simple: Power On, press Mode, pair the device, play music.
Your phone/tablet/computer controls also control the play/pause/stop, speaker volume and track selection so that no matter which one you’re closer to, you have maximum control.
Just for fun, my wife and I tested the speaker outside with my iPhone 4. I started playing a song on my phone with the Rocksteady XS paired. She walked down the street away from me to test the connectivity distance and the sound quality outside.
Both surprised us. She was over 100 feet away and I could still hear the music and control the speaker volume and track selection from my phone. I didn’t expect that kind of distance. At most, I figured 30 to 40 feet but over 100 really impressed us.
We switched tracks, played saved music, played Pandora, played audiobooks and my daughter even played back some voice recordings that were on the phone. Whichever app has the foreground is the one that you can hear through the speaker.
We’ve had a good time reviewing the Rocksteady XS bluetooth speaker. It’s a high quality device that you will enjoy using. We love it. My wife wants one and that’s significant because she doesn’t ever request technology. In the past ten years, she’s only asked for a few bits of technology: a laptop, an iPhone, an iPad mini and the Rocksteady XS. Mother’s Day is coming soon so I’m sure she’ll have one.
The Rocksteady XS speaker retails for $89.99 on Amazon.com. A bit pricey, in my opinion. I think a $49.99 price point would be far more attractive to me but my wife didn’t seem to have a big problem with $90, so maybe I’m wrong. It’s definitely cool, very portable, extremely well built/designed and loud enough that it doesn’t sound cheap or “tinny.” It sounds like a much larger device. The sound quality is very good. I say, “Buy it.”
I give it a 8.5 out of 10 because of the price and that it only comes with a 90-day warranty. For $90, I really think that one year is more appropriate.
Review: 8.5/10
Recommendation: Buy it.
A Lomographers Dream Come True: Tiffen Photo fx App (review)

Tiffen Software
Tiffen Photo fx
$2.99 Apple App Store
I don’t review many apps and there’s a good reason for it: not that many are really worth a good review. I don’t like to pan products unless I feel ripped off by them, so generally, if I review a product or piece of software, the review is going to be more positive than negative. The Tiffen Photo fx app is really good. Hopefully, that assessment is enough to pique your interest enough to read why I think it’s so good.
Tiffen’s Photo fx app is a Lomographer’s dream. I don’t know if that’s what Tiffen had in mind when they created this little gem but it certainly was the outcome, for me, at least.
I am a Lomographer. I own multiple cameras and much to my wife’s chagrin, I often lug two or more at a time with us on walks, trips and events. Yes, I also own a nice Canon EOS T3 digital SLR and an iPhone 4 with camera apps but I like the look and feel of film too.
However, <deep breath> I sometimes forego packing up like a beast of photographic burden and just carry my iPhone. Luckily for me I have Tiffen’s Photo fx app to make up for the unbearable lightness of being sans plastic cameras.
But enough about me and my hangups, you want to know about my review of the Photo fx app. Well, I like it. I like it a lot. In fact, I can just about reproduce every “Lomo” effect with it that I can get with one of my many Lo-Fi cameras. It pains me to say that because I really love my cheap, crappy cameras that most people would toss away like yesterday’s newspaper. Sorry about the newspaper reference there–I guess I’m not only dating myself but am going retro again.
The Photo fx app’s main screen allows you to either take a new photo or dig one out of your Camera’s photo gallery. The “effect” is the same so don’t sweat it if you didn’t take the picture with Photo fx. Once you either take a new photo or select one from your gallery of masterpieces, the fun begins.
There are dozens, if not hundreds (I don’t have the patience to count) of effects that await your creative eye. And these aren’t “canned” effects–each one is adjustable on one to three different parameters. The parameters could be brightness, blurriness, sharpness, skew, color intensity and many more. Each effect has its own range of things (parameters) that you can change for that effect.

One of the many effects is Photographic, which mimics different film types, filter types, exposures and so on. If you’re a photographer with any chops, you know what I mean. There are five pages of these photographic effects that vary from these yellows to blues, greens, reds and some other “one off” colors such as amber.
This single effect almost makes fun of photographic anachronists like myself because of the range of predictable creativity you get with it. You don’t get this kind of predictability with film or even digital cameras. You have to import the photos into another expensive program that will remain nameless here and then you have to manipulate it with masks, layers and so on until you get the right visual effect. Sure, your results might be a little better but I’ll have mine on Twitter or in an article way before you will.
The next two screen shots give you a look at two other effect matrices available to you: Special FX and Tint.

I took this picture of the iconic landmark Las Vegas sign on my recent trip. I’d never seen the sign before and had to do it this time. My wife and I walked from Mandalay Bay to the sign and back. We stayed at Caesar’s Palace and walked to Mandalay Bay first, then on to the sign. Not a short trek.
I used the sign because it has a good range of colors and it’s something that’s familiar to everyone.
The Tiffen Photo fx app is a very good buy at $2.99. It sounds a little pricey for an app but you’ll find no other app or three apps that can do all that it does. And in photographic equipment dollars, this app definitely saves some big bucks with its many effects–some of which would only be available through some darkroom trickery or expensive software manipulation.
 I give the Tiffen Photo fx app a solid 9 out of 10. Though it’s totally worth it, the price still leaves me a little flat. I think they’d get more traction at $1.99 but it’s not my call. It’s still a bargain at $2.99, especially if you’re an avid iPhoneographer like me. I say, “Get it.”
Review: 9/10
Recommendation: Get it.
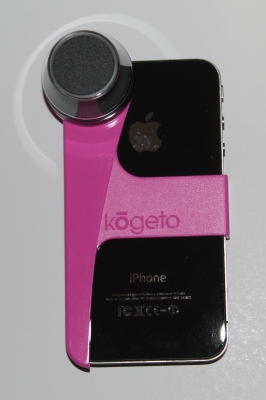
Kogeto Panoramic Accessory for iPhone 4 (Review)
Product: Kogeto Panoramic Accessory for iPhone 4
Price: $79.00 Retail, $36.33 Amazon.
Kogeto.com
Being an avid photographer is a double-edged sword. People love to look at and discuss my pictures, ask why I took certain shots and laugh at my purely artistic renderings. The other half, my subjects, often wonder if I have anything better to do with my time or my cameras. I do but I love photography, so we all must bear the curse of my hobby. When I received the Kogeto Dot for review, my family scattered into every possible direction knowing that they’d be filmed in wonderful 360-degree awesomeness.
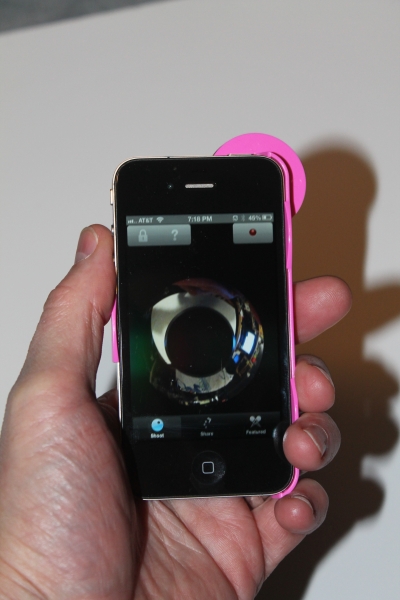
For review, I received the Kogeto Dot “Breast Cancer Awareness” version in bright pink, which is hard to miss, especially when I’m carrying it around. Everyone looks in wonder. At least once every time I attach it to my phone, someone asks me about it and wants to see it work. I took it to the Tulsa State Fair and walked past The Side Show to give it a test. You can see that everyone nearby looked on as if I had on clown makeup (I didn’t).
The Dot is a very fun gadget to use. I love it. It’s lightweight (0.5 ounce) and, if you get the black one, hardly anyone would notice it.
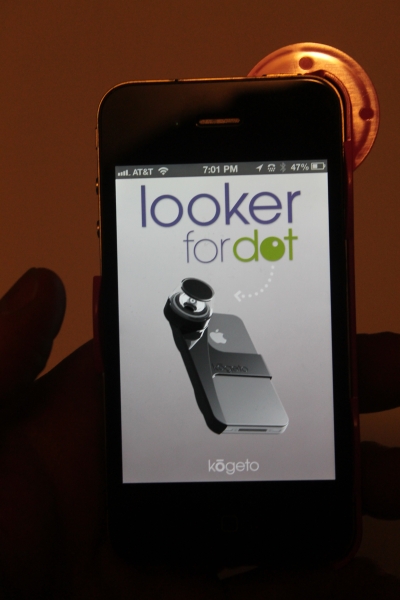
The cool thing about it is that it comes with its very own app, Looker. Of course, the app is free and works very well with the camera lens. The only things you have to get used to are: 1) You have to hold it face up (lens down) with the phone flat and 2) You have to trust the app, not your eyes. If you look at the app picture, you can’t tell what you’re looking at because you basically get a donut shaped viewer that looks very distorted. Don’t look at it.
Open the Looker app, press record, hold the phone high over your head with the lens down. When you upload the video to the Kogeto page, click the Flip button to turn your video right side up. The reason you have to hold it with the lens down is because of glare from light sources, such as overhead lights, the sun and any light that’s brighter than your surroundings.
When you watch your videos, you can actually pan the video while you’re watching them. Live panning. It’s so cool. I just can’t enough good about this little gadget. It’s fun, it’s inexpensive and it’s a cool addition to any iPhoneographer’s bag. You gotta have it.
I give this product a rare and perfect 10/10.
My Kogeto Dot gallery:


 Techopedia
- An error has occurred; the feed is probably down. Try again later.
Datamation
- Google and NextEra Strike AI-Powered Grid Deal
- NYT Sues Perplexity AI in Copyright Conflict
- Cloudflare Outage Affects Major Websites
- OpenAI Forces AI to Confess Its Lies
- OpenAI Declares Code Red as Google’s Gemini 3 Threatens ChatGPT
- Coupang Breach Exposes 33.7M South Koreans’ Data
- ChatGPT Celebrates Third Anniversary
- Asahi Group Reveals Findings of Cyberattack
- OpenAI Discloses Mixpanel Security Incident Affecting Some API Users
- Firefox Zero-Day Flaw Exposed 180M Users


You must be logged in to post a comment.