Archive
The Diamond Multimedia PlugnView Home Monitoring Kit (Review)
 PlugnView Home Monitoring Kit
Live video security camera hardware
Diamond Multimedia
$119.99 Retail/$94.66 Amazon (Prime)
Product Spotlight Video
Like all Diamond Multimedia products, the PlugnView Home Monitoring Kit (PlugnView) is a high quality, low cost product. Diamond succeeds in putting a lot of ‘bang for the buck’ into every one of its devices. And you know that you have a Diamond Multimedia product because it has all the familiar design features: small footprint, abundant ventilation slots, highly visible labels, status lights, attention to details such as furniture-protecting rubber feet, and high impact plastic construction.
Diamond Multimedia (DMM) puts a lot of thought into its products. The PlugnView is standard high quality fare for a DMM product, which is worth noting here.
 Included in the kit is everything you need except the apps, which are available through Apple’s App Store or through Google Play. You get the PlugnView camera, a HP500AV Home Plug Adapter, a Quick Start guide, and a three-foot Ethernet cable.
DMM also has a reputation for making products that are very easy to setup and use. The PlugnView follows that time-honored tradition too.
To setup the PlugnView, attach the Ethernet cable to the HP500AV, plug in the Ethernet cable’s free end directly into an open slot in your router or into an open slot in your network switch, and plug in the HP500AV to electric power. The HP500AV has to access your network via the Ethernet cable and then it attaches to your PlugnView camera via wireless. All three lights should be green, when properly connected.
Plug in the PlugnView camera to electric power and aim it at whatever you want to view. The camera swivels left and right on its base plus you can adjust the vertical (up and down) pitch as well. These adjustments are manual. You can’t move (pan) the camera electronically to scan an area.
Next, download the PlugnView app from the Apple App Store or, if you have an Android device, from the Google Play Store.
Open the app, tap the Plus (+) button to add a camera. On the next screen, select the way you want to add your camera to the app: via QR code on the bottom of the camera, local network search, or manually. I suggest that you attempt to add your camera first by searching. If that doesn’t work, then scan the QR code on the bottom of the PlugnView. Finally, if those two fail, add it manually. But one should work and adding manually is a pain because of the length of the ID and the password. You can change the password later in the app.
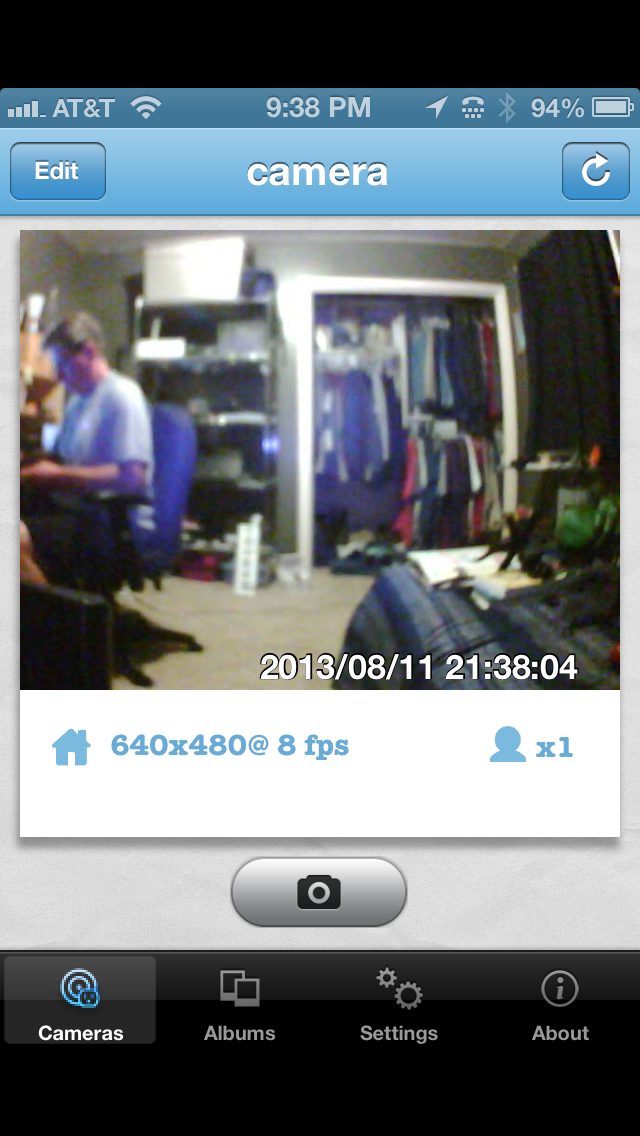
Figure 1: A live video view using the iPhone PlugnView app.
A local network search should find your camera within a few seconds. Once it does, you’ll see the cryptic identification code for your camera. Tap the found camera to edit its properties. Name your camera. I named mine “camera”. Leave the Camera ID as is. Enter the camera password from the bottom of the camera. Be careful to type it in exactly as you see it. Tap Save when done. Tap the Done button when your camera light in the app turns green.
Tap the camera that you just setup. You’ll see a “connecting to camera” message and then in a few seconds, you’ll see what the camera sees. You can also take pictures by tapping the camera icon on the screen. See Figure 1.
If you tap the Edit button (upper left corner), you can change the configuration of your camera, such as enhanced night vision, frame rate, resolution, and a few other details.
I suggest changing the frequency from 60Hz to 50Hz for better viewing inside your home. 60Hz probably works better outside. I also like the highest resolution and best quality picture available. You’ll have to experiment a bit for your surroundings and lighting conditions. Once you change something, tap the Apply button for it to take effect and then evaluate the results.
The PlugnView has pretty good resolution for the cost. Remember that this camera is not high definition video capable. It is what it is, which is an inexpensive, easy to setup, easy to use security camera. If you need something with higher resolution, sound, faster frame capture, and a panning camera, then you’ll have to spend a lot more money. For around $100, I doubt you’ll find anything better.
The PlugnView Home Monitoring Kit will keep you aware of what’s going on inside or outside your home. The PC software that you can download from DMM’s site is quite good. You can monitor multiple cameras at once with it but the app is a quick view used for occasional monitoring from your mobile device.
My overall impression and evaluation of the PlugnView Home Monitoring Kit is favorable. I like the ease of setup, the product quality, and the mobile app combination.
Why it’s frugal: The PlugnView is inexpensive but it’s more than price. If you need a decent quality home security camera, it fits that bill. You have night vision that is quite good, live video, snapshots, and good resolution. It is a good value and a good product.
Review: 8/10
Recommendation: Buy it with an understanding of its limitations and its features.
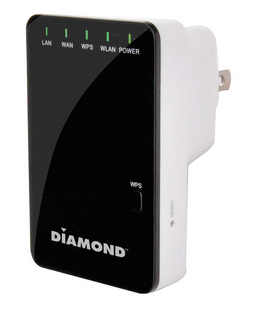
Diamond Multimedia Wireless Range Extender and Router WR300NR (Review)
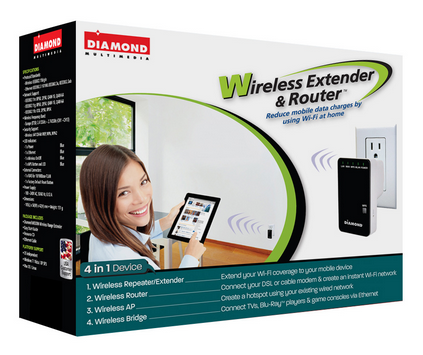 Wireless Extender and Router WR300NR
Wireless Router – Bridge – Repeater – Access Point
Diamond Multimedia
$49.99 Retail/$39.99 Amazon (Prime)
Product Spotlight Video
Diamond Multimedia offers a variety of wireless devices to extend your wireless networks, provide additional security to your wireless users, and to provide some advanced home networking features at a very low cost. The WR300NR (NR) is a sophisticated but inexpensive 4-in-1 wireless networking device. It can act as a router (default), a bridge, a wireless access point (hotspot), and a range extender. You can check out my review of a similar 3-in-1 product (range extender, bridge, wireless access point) from Diamond Multimedia–the WR300NSI Wireless Range Extender for comparison.
This review is not a comparison of the two products but rather a focus on the WR300NR’s router capability, which generally sets it apart from the WR300NSI.
The NR provides you with an extra layer of security as a router that you really need when using public Internet connections such as those in hotel rooms. You can read elsewhere about how non-secure public WiFi hotspots are. The NR protects you by adding a barrier or Firewall between you and the outside world.
 Setup is easy with the NR.
To start, plug in the device into any standard electric socket. Use the included RJ-45 network cable to plug into the LAN side of the device and the other end into the network card (NIC) in your laptop or desktop computer.
Restart the computer that’s connected to the NR or disable/enable the NIC to refresh its connection so that the NR supplies your computer with an IP address.
Open your favorite Internet browser application (Internet Explorer, Chrome, Firefox, etc.) and point it to http://192.168.10.253.
When prompted, enter admin for the username and admin for the password.
The initial screen opens for you. Note the navigation area on the left side of the screen. See Figure 1 for reference.

Figure 1: WR300NR Main Setup Screen
Use the included instruction booklet and the Wizard selection from the web page’s navigation menu to setup your NR. Router is the default setting. Click NEXT to continue.
If you’re setting up the NR to be your Internet gateway, then you’ll need to refer to your Internet provider’s documentation to tell you what kind of connection you have so that you can set your NR’s router mode: Fixed or Static IP Address, Dynamically assigned IP Address (DHCP), or an ADSL dialup (PPoE).
You can also setup your SSID, channel (Auto is fine), and security mode (Disabled, WPA, WPA2, or WPA/WPA2 mixed). I suggest WPA2.
NOTE: Do NOT leave your router in Disabled mode (default). Always use security on your home network so that passersby, neighbors, and criminals can’t piggyback onto your connection and potentially get you into trouble by downloading or uploading illegal files or participating in other illegal behavior at your expense.
That’s all there is to it. Basically one step with a few subparts. Click SAVE & REBOOT to save your settings and reboot the device.
For advanced users, there are many tweaks and settings to alter. You can configure the Firewall to meet your needs, change the Wireless settings, and edit just about every possible parameter.
Don’t worry about messing up or configuring yourself out of the device completely, since you can always reset the device to factory defaults by pressing the RESET button with an ink pen located on one side of the NR. Remember that if you do this, all of your changes will be gone. You will also have to reconnect to the device as described above by pointing your browser to http://192.168.10.253 and using username admin and password admin to return to the configuration screen.
Also, you’ll want to change the username and password for your router from the default. You don’t want to leave it as admin/admin. To change the username and password, click Management in the navigation pane. Why do this? Because if someone attempts to hack into your network, the first username and password combination he’ll try is admin/admin.
Remember to change the username and password if you travel and have to reset the NR. For $40, you could always buy two: One for home and one for travel.
The NR is a very capable router and firewall. For the money, it might be the best I’ve seen. There are many devices in this group from which to choose but none as small (2.9 x 1.9 x 1.6 inches), as feature-filled, or as competitively priced as the WR300NR.
Why it’s frugal: You could spend more for a larger device with the same or similar features and pay a lot (2-3X) more but why would you when the NR has everything you need? For $40 and free shipping from Amazon (For Prime members), it doesn’t make sense to buy anything else.
Rating: 9/10
Recommendation: Buy it. Use it at home and take it with you on the road.
 Techopedia
- An error has occurred; the feed is probably down. Try again later.
Datamation
- Envirotech Vehicles (NASDAQ: EVTV) Closes Merger with Azio AI Ahead of Schedule, Positioning Combined Company to Capture $487 Billion 2026 AI Infrastructure Opportunity
- HoneyBook Study Finds Photographers’ Biggest Challenge Is Managing Client Bookings
- Minimus Expands Enterprise Security Platform with General Availability of Advanced Supply Chain Controls
- Top 7 Cloud Data Warehouse Companies (2026)
- 9 Best AI Certification Courses to Future-Proof Your Career for 2026
- Lyrie.ai Deploys Real-Time Zero-Day Tracking Across Global Enterprise Infrastructure
- How To Get a Job in Data Visualization: Ultimate Guide (2026)
- 10 Best Cloud-Based Project Management Software Platforms for 2026
- 76 Top SaaS Companies to Know in 2026
- 16 Top Cloud Computing Companies in 2026


You must be logged in to post a comment.