Archive
Don’t get caught in the rain without your Bheestie Bag (Review)
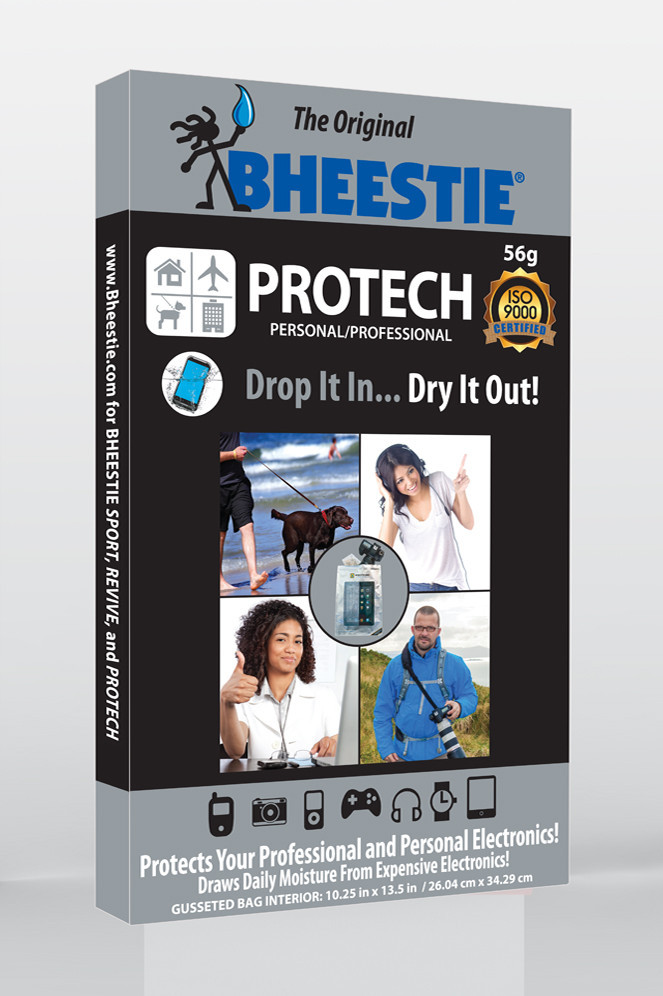
56g Bheestie Bag
Bheestie Bag (56g)
Bheestie & Co., LLC.
$29.95 (56g)/ $17.95 (28g)
What’s worse than getting your new Canon T3 DSLR wet because you got caught in the rain? Telling your wife that you think your new Canon T3 DSLR might be ruined because you got caught in the rain, that’s what. Water and electronic devices don’t mix. It’s kind of an oil and water thing, only much worse. Plus, even at the price of oil these days, electronics are still more expensive. They’re far too valuable to use a few times and then have to scrap them or sell them on an auction site for pennies on the dollar just because they got a little damp.
We were on a short, impromptu family vacation this summer in Wyoming (aka Kenapalooza), when we got caught in a downpour at a place called Veedauwoo (between Laramie and Cheyenne) in southern Wyoming. Nice place. Cool rock formations and a biblical proportion deluge that was unexpected.
Southern Wyoming. Summer. Downpour. Which of these things doesn’t belong?
I did everything I could to protect my camera during the quick mile-long walk back to the car in ever-increasing rain. We were all soaked by the time we got back to the parking lot. I held my camera and leaned over it while I walked at first. The trees protected me from the rain when it was only sprinkling. But when the rain came down so hard that I couldn’t see ten feet in front of me, I was worried. I was worried about our safety and my camera’s status as a floatation device.
Soon, I placed the camera under my shirt and walked briskly back toward the car. The rain came harder. The camera, under my shirt, was still getting wet. I bent over it to shield it more, while also trying to trot along while herding kids, my wife, and her sister uphill toward dry refuge.
As soon as I got back to the car, I dried myself and the camera with a beach towel that we had in the back. My wife looked as if I’d sacrificed our first born to an angry volcano.
We were both upset at the prospect of my camera becoming a paperweight, when I’d only had it a few months.
I meticulously dried it after getting back to her sister’s house a few hours later.
The only thing I noticed that had gone wrong was that the Flash wouldn’t pop up when it was supposed to. It just made this loud clicking noise and an error appeared on the LCD screen.
Ruined, I thought. Ruined.
I’ll never be able to replace it. That’s OK, I can always go back to film. Yeah, like that’s an option these days with all of my online venues, Dropbox, and relatives that don’t want to wait two days for developing and scanning.
Rice wouldn’t work with a DSLR. I’m not putting my camera into a bowl of rice to dry it out. That’s just silly.
A few days went by and I had researched ways to get my Flash to pop up again but no luck. A few more days went by and I got an email from a representative of Bheestie who read one of my stories about the trip and wanted me to test out the bag on my camera. I said that I would.
After receiving the bag and reading the instructions (I know, who does that? But, hey, I’m desperate), I reluctantly placed my camera in the bag and sealed it shut. I left the camera in for 24 hours per the instructions.
The next evening, I removed my camera, checked it out and then thought I’d try the ultimate test.
Click, click, pop! Up came the flash.
Whoa!
It worked. I was so happy that I tried it over and over and it worked every time. Sometimes after only one click but it worked.
I put it back into the bag for another 24 hours to be sure that everything that could be done was done.
I brought the camera out and have had no trouble with my flash. Sometimes it only clicks once and sometimes it pops up the first time. It’s not 100 percent back but it’s much better than 100 percent broken.
If I’d had the Bheestie Bag on the day that the camera got wet, I think it would have been much better. Instead, I had to rely on other methods that weren’t effective such as drying with rubbing alcohol, blow drying, and using Q-tips.
The Bheestie Bag saved my camera from the auction block and saved me from the wrath of “you know who.” I wish I’d had it sooner but I didn’t know about it. The large bag (56g) was more than adequately big enough for my camera, attached lens, and strap.
I’m convinced that the Bheestie Bag is the right choice for anyone who uses electronics such as DSLRs, phones, tablet computers, or anything that might get wet in the process. Personally, I’ll never be without one. If you’re thinking that a bowl of rice is just as good, you’re wrong. That might work for a momentary plunk into some water but for something that’s soaked, you’d better have something other than rice available to you.
I’m sure that there are commercial services that would dry your gadget for you at almost the price of a new one but that isn’t frugal. So, how is the Bheestie Bag frugal, you ask? $500 camera. $30 fix. You do the math.
It would be ridiculous of me not to highly recommend the fix for my camera, now wouldn’t it? It worked for me and there are hundreds of other testimonials on the Internet that agree.
Review: 10/10
Recommendation: Buy one and keep it handy for emergencies. You don’t use a fire extinguisher everyday but you keep one handy, don’t you?
Quiller: Your private Journal App (Review)
![]() Quiller (App)
Quiller (App)
Journaling App for iPad
From Passion to Purpose, LLC.
$1.99 Apple App Store
Follow: @quillerapp
Remember Doogie Howser, MD. pecking away at the end of every episode in the obscure blue-screened word processor to record the day’s thoughts, hopes, and dreams? Sure you do. Primitive wasn’t it? Well, if Doogie inspired you to begin journaling back then but you never did anything about it, let Quiller bring that inspiration into the 21st Century as an iPad app.
When questioned, something to the tune of 85% of all people want to write for publication but sadly, or maybe happily for writers like me, fewer than five percent ever become published in any kind of forum. But you don’t have aspire to be the next Hemingway or James Joyce to enjoy putting your own thoughts down onto electronic paper or into an electronic journal.
You, like many others, can journal for the therapeutic value or for posterity. But whatever your reason for doing it, Quiller can make it easy–far easier than using a word processor or Big Chief tablet. If you know what a Big Chief tablet is, bless you. If not, it has nothing to do with what you call a tablet today. This one is made of paper and has lined pages. I’m pretty sure that it was the substrate onto which many novels and journals were written. I digress.
Quiller is the new genre of journaling. It is a prompt-driven journaling program that helps you collect your thoughts, navigate the app, and even apply an emotion (via emoticon) to the day.
You can create multiple journals, each with a different look, and you can password protect them too–each with a different password, if you prefer. This also means that if you share a single iPad in your family, each of you can have your own password-protected journal. How do you know which journal is yours? You engrave your name on it. Nice.
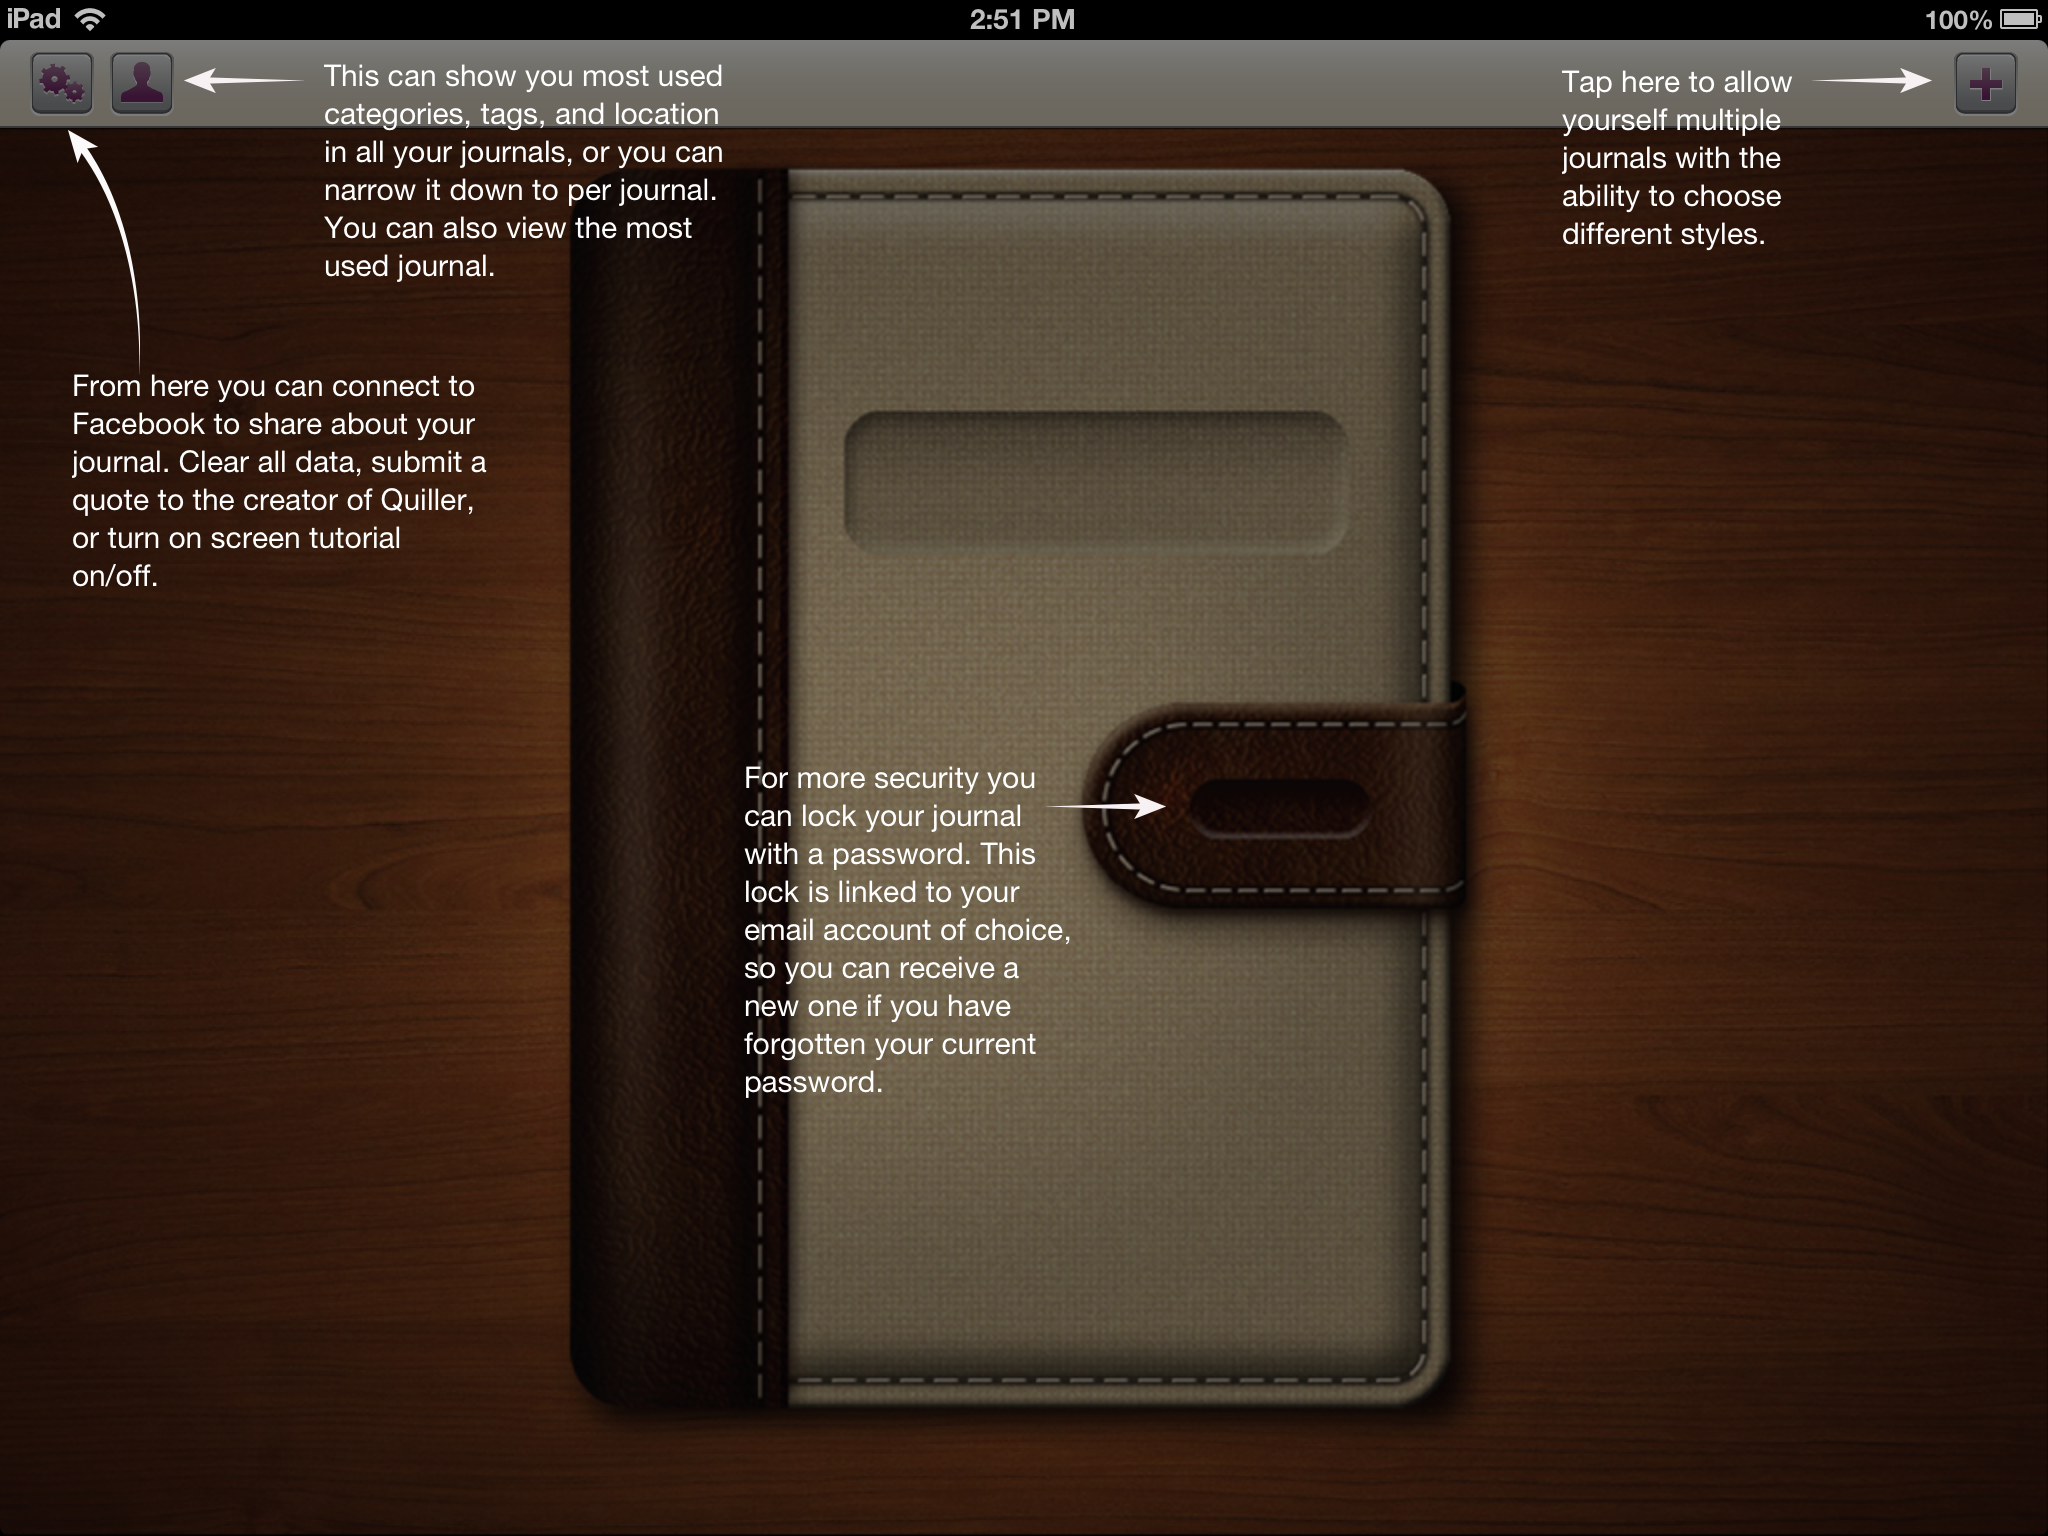
Figure 1: Creating a new journal.
Oh, and if you forget your journal password, you can have it reset via email, so that you never get locked out of your journal.
To understand what’s meant by “prompt-driven,” refer to Figure 1 that shows you what a new journal looks like when you open it for the first time.

Figure 2: Starting your new journal.
As you can see from Figure 2, there are more prompts once you open your journal and begin or continue writing. My daughter left me a message back in June. Yes, I’ve been a bad boy in not getting this review finished months ago. Apologies all around. Better late than never.
To use the journal, simply follow the on screen prompts. It really couldn’t be any easier than that.

Figure 3: Your Personal Stats Page.
There is a very interesting additional detail that the designers put into Quiller: Personal Stats. To get to your personal stats, go back to the home area by tapping the Home icon in the app. Now tap the Person icon at the top of the screen to see a page similar to that in Figure 3.
The other very cool feature shown on this page is that you can export your journal entries as PDF or TXT files. This is an extremely valuable feature if you ever decide to publish or self-publish your writings.
Quiller, at $1.99, is not the least expensive app on the market but it’s certainly one of the finest that I’ve seen at any price. No ads to bug you or distract you. That’s worth 99 cents all by itself. Remember that any “free” apps that you get will probably have ads and those annoying “In App” purchase prompts.
Remember Quiller is prompt-driven not ad-driven.
Why it’s frugal: Quiller is a quality app that helps you get your thoughts down on “paper.” You might not save a bundle of money by using it but if your writing is good and you stick with it, you could become a published writer, if that’s your thing. Buying a quality product that doesn’t constantly tap you to buy something else is worth something.
Since you can create multiple journals and password protect them individually, you only have to buy Quiller once. That’s pretty frugal.
The only features missing from Quiller are the ability to allow you to write with a stylus–or something other than the keyboard and the ability to embed pictures or graphics either from external sources or from your own scribbles.
Review: 9/10
Recommendation: Buy it and write, write, write.
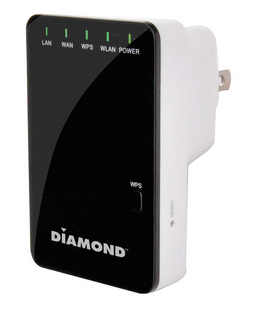
The Diamond Multimedia PlugnView Home Monitoring Kit (Review)
 PlugnView Home Monitoring Kit
Live video security camera hardware
Diamond Multimedia
$119.99 Retail/$94.66 Amazon (Prime)
Product Spotlight Video
Like all Diamond Multimedia products, the PlugnView Home Monitoring Kit (PlugnView) is a high quality, low cost product. Diamond succeeds in putting a lot of ‘bang for the buck’ into every one of its devices. And you know that you have a Diamond Multimedia product because it has all the familiar design features: small footprint, abundant ventilation slots, highly visible labels, status lights, attention to details such as furniture-protecting rubber feet, and high impact plastic construction.
Diamond Multimedia (DMM) puts a lot of thought into its products. The PlugnView is standard high quality fare for a DMM product, which is worth noting here.
 Included in the kit is everything you need except the apps, which are available through Apple’s App Store or through Google Play. You get the PlugnView camera, a HP500AV Home Plug Adapter, a Quick Start guide, and a three-foot Ethernet cable.
DMM also has a reputation for making products that are very easy to setup and use. The PlugnView follows that time-honored tradition too.
To setup the PlugnView, attach the Ethernet cable to the HP500AV, plug in the Ethernet cable’s free end directly into an open slot in your router or into an open slot in your network switch, and plug in the HP500AV to electric power. The HP500AV has to access your network via the Ethernet cable and then it attaches to your PlugnView camera via wireless. All three lights should be green, when properly connected.
Plug in the PlugnView camera to electric power and aim it at whatever you want to view. The camera swivels left and right on its base plus you can adjust the vertical (up and down) pitch as well. These adjustments are manual. You can’t move (pan) the camera electronically to scan an area.
Next, download the PlugnView app from the Apple App Store or, if you have an Android device, from the Google Play Store.
Open the app, tap the Plus (+) button to add a camera. On the next screen, select the way you want to add your camera to the app: via QR code on the bottom of the camera, local network search, or manually. I suggest that you attempt to add your camera first by searching. If that doesn’t work, then scan the QR code on the bottom of the PlugnView. Finally, if those two fail, add it manually. But one should work and adding manually is a pain because of the length of the ID and the password. You can change the password later in the app.
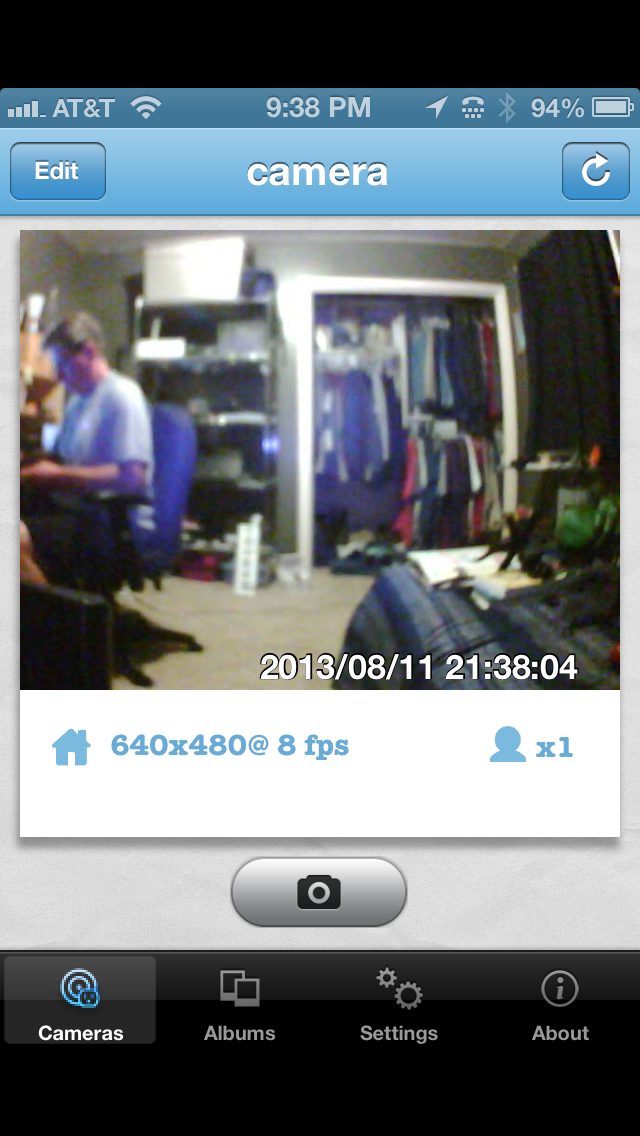
Figure 1: A live video view using the iPhone PlugnView app.
A local network search should find your camera within a few seconds. Once it does, you’ll see the cryptic identification code for your camera. Tap the found camera to edit its properties. Name your camera. I named mine “camera”. Leave the Camera ID as is. Enter the camera password from the bottom of the camera. Be careful to type it in exactly as you see it. Tap Save when done. Tap the Done button when your camera light in the app turns green.
Tap the camera that you just setup. You’ll see a “connecting to camera” message and then in a few seconds, you’ll see what the camera sees. You can also take pictures by tapping the camera icon on the screen. See Figure 1.
If you tap the Edit button (upper left corner), you can change the configuration of your camera, such as enhanced night vision, frame rate, resolution, and a few other details.
I suggest changing the frequency from 60Hz to 50Hz for better viewing inside your home. 60Hz probably works better outside. I also like the highest resolution and best quality picture available. You’ll have to experiment a bit for your surroundings and lighting conditions. Once you change something, tap the Apply button for it to take effect and then evaluate the results.
The PlugnView has pretty good resolution for the cost. Remember that this camera is not high definition video capable. It is what it is, which is an inexpensive, easy to setup, easy to use security camera. If you need something with higher resolution, sound, faster frame capture, and a panning camera, then you’ll have to spend a lot more money. For around $100, I doubt you’ll find anything better.
The PlugnView Home Monitoring Kit will keep you aware of what’s going on inside or outside your home. The PC software that you can download from DMM’s site is quite good. You can monitor multiple cameras at once with it but the app is a quick view used for occasional monitoring from your mobile device.
My overall impression and evaluation of the PlugnView Home Monitoring Kit is favorable. I like the ease of setup, the product quality, and the mobile app combination.
Why it’s frugal: The PlugnView is inexpensive but it’s more than price. If you need a decent quality home security camera, it fits that bill. You have night vision that is quite good, live video, snapshots, and good resolution. It is a good value and a good product.
Review: 8/10
Recommendation: Buy it with an understanding of its limitations and its features.
Diamond Multimedia Wireless Range Extender and Router WR300NR (Review)
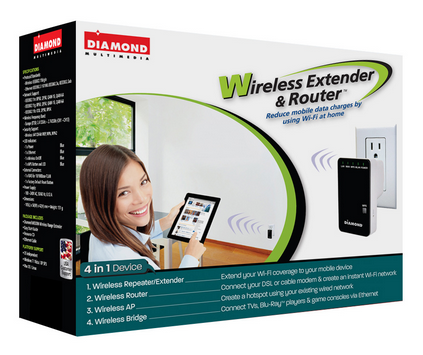 Wireless Extender and Router WR300NR
Wireless Router – Bridge – Repeater – Access Point
Diamond Multimedia
$49.99 Retail/$39.99 Amazon (Prime)
Product Spotlight Video
Diamond Multimedia offers a variety of wireless devices to extend your wireless networks, provide additional security to your wireless users, and to provide some advanced home networking features at a very low cost. The WR300NR (NR) is a sophisticated but inexpensive 4-in-1 wireless networking device. It can act as a router (default), a bridge, a wireless access point (hotspot), and a range extender. You can check out my review of a similar 3-in-1 product (range extender, bridge, wireless access point) from Diamond Multimedia–the WR300NSI Wireless Range Extender for comparison.
This review is not a comparison of the two products but rather a focus on the WR300NR’s router capability, which generally sets it apart from the WR300NSI.
The NR provides you with an extra layer of security as a router that you really need when using public Internet connections such as those in hotel rooms. You can read elsewhere about how non-secure public WiFi hotspots are. The NR protects you by adding a barrier or Firewall between you and the outside world.
 Setup is easy with the NR.
To start, plug in the device into any standard electric socket. Use the included RJ-45 network cable to plug into the LAN side of the device and the other end into the network card (NIC) in your laptop or desktop computer.
Restart the computer that’s connected to the NR or disable/enable the NIC to refresh its connection so that the NR supplies your computer with an IP address.
Open your favorite Internet browser application (Internet Explorer, Chrome, Firefox, etc.) and point it to http://192.168.10.253.
When prompted, enter admin for the username and admin for the password.
The initial screen opens for you. Note the navigation area on the left side of the screen. See Figure 1 for reference.

Figure 1: WR300NR Main Setup Screen
Use the included instruction booklet and the Wizard selection from the web page’s navigation menu to setup your NR. Router is the default setting. Click NEXT to continue.
If you’re setting up the NR to be your Internet gateway, then you’ll need to refer to your Internet provider’s documentation to tell you what kind of connection you have so that you can set your NR’s router mode: Fixed or Static IP Address, Dynamically assigned IP Address (DHCP), or an ADSL dialup (PPoE).
You can also setup your SSID, channel (Auto is fine), and security mode (Disabled, WPA, WPA2, or WPA/WPA2 mixed). I suggest WPA2.
NOTE: Do NOT leave your router in Disabled mode (default). Always use security on your home network so that passersby, neighbors, and criminals can’t piggyback onto your connection and potentially get you into trouble by downloading or uploading illegal files or participating in other illegal behavior at your expense.
That’s all there is to it. Basically one step with a few subparts. Click SAVE & REBOOT to save your settings and reboot the device.
For advanced users, there are many tweaks and settings to alter. You can configure the Firewall to meet your needs, change the Wireless settings, and edit just about every possible parameter.
Don’t worry about messing up or configuring yourself out of the device completely, since you can always reset the device to factory defaults by pressing the RESET button with an ink pen located on one side of the NR. Remember that if you do this, all of your changes will be gone. You will also have to reconnect to the device as described above by pointing your browser to http://192.168.10.253 and using username admin and password admin to return to the configuration screen.
Also, you’ll want to change the username and password for your router from the default. You don’t want to leave it as admin/admin. To change the username and password, click Management in the navigation pane. Why do this? Because if someone attempts to hack into your network, the first username and password combination he’ll try is admin/admin.
Remember to change the username and password if you travel and have to reset the NR. For $40, you could always buy two: One for home and one for travel.
The NR is a very capable router and firewall. For the money, it might be the best I’ve seen. There are many devices in this group from which to choose but none as small (2.9 x 1.9 x 1.6 inches), as feature-filled, or as competitively priced as the WR300NR.
Why it’s frugal: You could spend more for a larger device with the same or similar features and pay a lot (2-3X) more but why would you when the NR has everything you need? For $40 and free shipping from Amazon (For Prime members), it doesn’t make sense to buy anything else.
Rating: 9/10
Recommendation: Buy it. Use it at home and take it with you on the road.
Diamond Multimedia Wireless Range Extender WR300NSI (Review)
 Wireless Range Extender WR300NSI
Bridge – Repeater – Access Point
Diamond Multimedia
$49.99 Retail
Product Spotlight Video
Quick, what fits in the palm of your hand, can double the range of your wireless network, and only takes five minutes to setup? Yeah, that’s a tough one but the answer is the Diamond Multimedia Wireless Range Extender model WR300NSI. A mouthful to be sure but you’ll be glad you said it after you’re able to extend the range of your wireless network to near double its current output.
Now, Diamond Multimedia doesn’t boast a particular amount of range extension but I found that my wireless network coverage umbrella was just about doubled to a whopping 150 feet around my house. I tested the WR300NSI by plugging it into various outlets around and outside of my house to find out its true range and found that at 150 feet I was beginning to lose the signal and switch to LTE. Immediately upon turning around back into the coverage area, my WiFi picked up and started working. Impressive.
 If I had several of these devices setup around my house or inconspicuously around the neighborhood, I could effectively provide Internet access through my main broadband connection for a large section of my subdivision. Now I probably wouldn’t do that but I might usurp a couple of my neighbor’s outside electrical outlets to extend my capable range so that I can enjoy my very own WiFi on my occasional walks to and from the neighborhood pool.
The unit setup quite fast. Basically you plug it in, connect it via the supplied Cat5 network cable to a laptop (or desktop), hit the built-in web server at http://10.0.10.254, type in your wireless password (I hope you have a protected WiFi network) and you’re done once the unit reboots.
My suggestions for maximum coverage:
If you’re wanting to cover your whole house and a bit of outdoors, plug in the unit near the center of your house as high up on the wall as possible. Use an extension cord and place the unit somewhere inconspicuous but not blocked. If you’re providing access to a large yard, plug in the unit outside and perch it up high again for maximum coverage.
The signal, like any such signal, doesn’t travel well through neighboring houses. It’s not line-of-sight but the fewer restrictions, the better signal you’ll have.
Speaking of signal strength, place the unit where you see three wireless signal bars. That will give you maximum boost for your wireless signal and the best coverage overall. Fewer than three bars means that you’re repeated signal will be less than optimum. But hey, those who leech onto your signal can’t be too choosy right? You could tell them to use their cellular data connection instead, if they complain too much.
For $50, the WR300NSI is an excellent range extender. It does exactly what it says it does. Diamond doesn’t oversell this product by telling you that it will double your range but my field test says that it will.
Interestingly, this little pearl also acts as a wireless access point or a bridge. You change those settings in the Setup area of the internal web page. All it requires is a single click on your choice and a reboot. I wish I’d had this device two years ago when I struggled for several days setting up a bridge for my garage data center. It would have made my life much easier. Sure I learned a lot but I also probably heated up my room in hell doing it from all of the cussing and complaining that I did during the process. Feel sorry for my wife, since she had to hear the <expletives deleted> from my office and the garage over the course of my frustration. I digress.
 The WR300NSI is easy to setup and to use. You’ll love it. I do. I plan to extend my backyard coverage with it connected outside so my kids will stop using so much cellular data. Thanks, Diamond Multimedia, you’re saving me more than the cost of the unit in a single month of that.
I highly recommend the WR300NSI and I give it a solid 10 out of 10. I find no reason to complain about this product, which, if you read my blog–that’s a real deviation for me.
Why it’s frugal: The WR300NSI is frugal because it extends your wireless network inexpensively. Sure there are other products out there that do the same thing but not as inexpensive or as easy. Even grandma can setup the WR300NSI and that’s worth a portion of Fort Knox, if you know what I mean. Anything that prevents those free family support phone calls is a very good thing.
Recommendation: If you need to extend your WiFi network, buy it. It makes a great gift too. Imagine getting one.
Review: 10/10
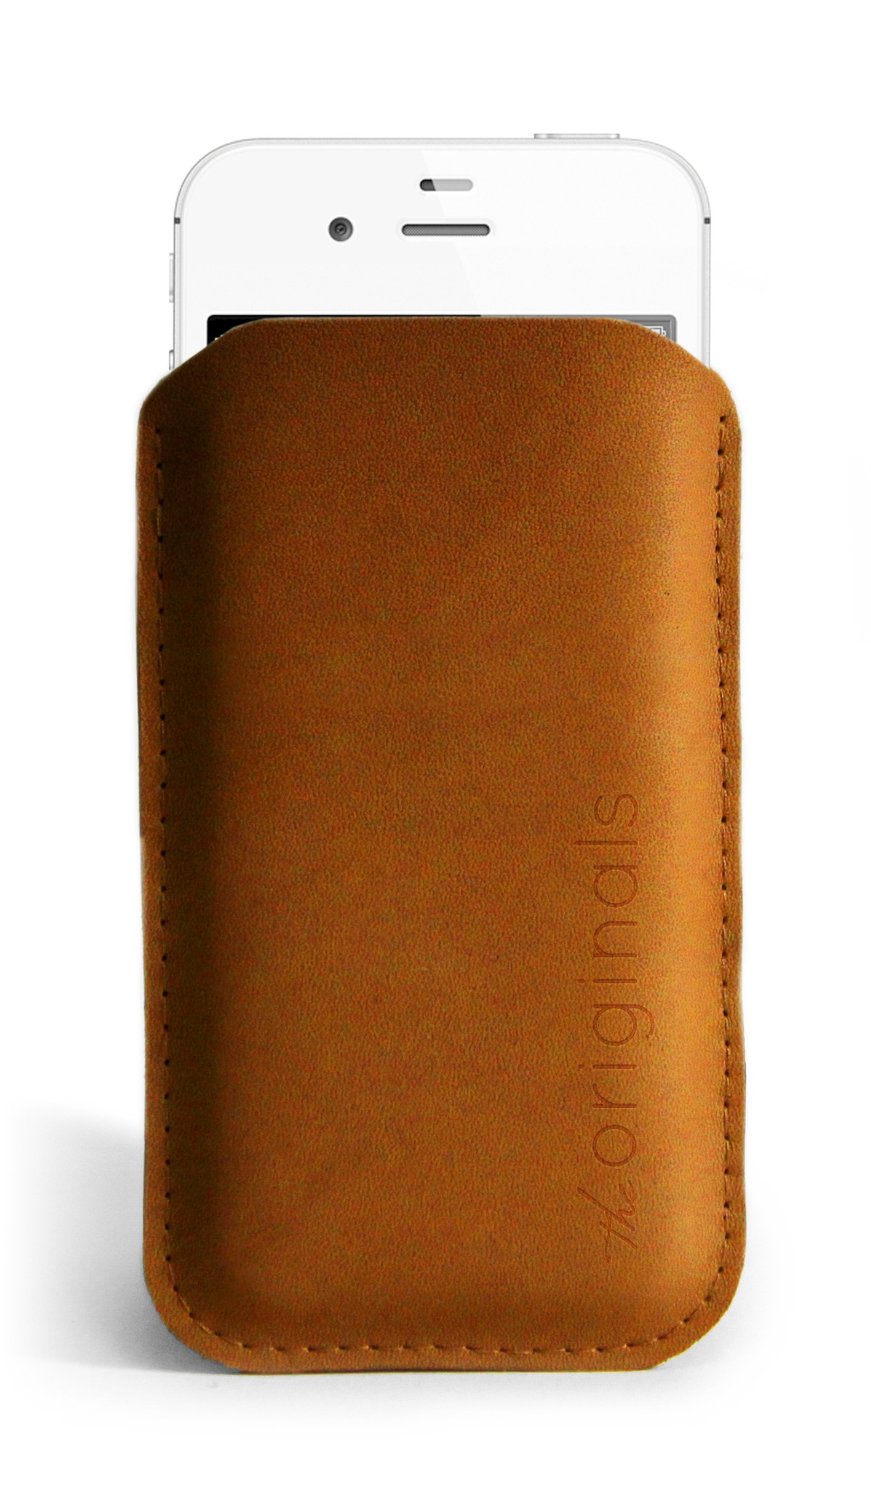
Mujjo iPhone 5 Leather Sleeve: Originals Collection (Review)
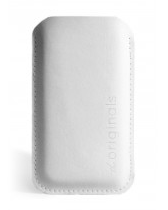 iPhone 5 Leather Sleeve
Originals Collection
Mujjo
Retail 34.95 Euro/~$45.00 USD
If you prefer to keep your iPhone naked, then the new Mujjo iPhone 5 sleeve is just what you need to protect your investment when it’s not in use. This all leather, vegetable-dyed sleeve will provide you with all the protection you’ll need from scratches, drops, dirt, dust, and smudges from carrying around in a pocket, a briefcase or a purse.
The Mujjo sleeve is a quality product. It is not a cheap knock-off. It’s real stitched leather, subtly stamped with “The Originals” on one side to show that the product is part of Mujjo’s Originals Collection.
The sleeves, also available for the iPhone 4/4S, come in beautiful ivory white or natural brown. This review covers the white sleeve.
Don’t confuse this sleeve with a protective case. This sleeve is protective but you have to remove the phone from the case before you use it. You also can’t use the case with other protective cases, although you could use a screen protector with this product with no trouble. This case is for those of us who prefer to use our phones naked.
 The price of the sleeve is not cheap at around $45.00 USD, it’s a fashion statement as well as a protective element. Why not have something a little posh as well as useful? After all, isn’t that what fashion is all about?
The sleeve holds your phone tight so that there’s little chance of it slipping out on its own. You’ll feel confident in its protective capability while you’re running for a taxi or bumping into strangers on the bus or subway.
On a funny side note, neither my wife nor my daughter “get” the purpose of the sleeve. Both of them looked at the product and simply asked, “Why?”
The “Why” is simple to answer: It’s a statement–a statement about who you are and about quality products. No one needs expensive rims on a car, $300 Prada sunglasses, a $75,000 Mercedes, or a $45.00 iPhone sleeve. It isn’t about need. To be perfectly honest, I don’t need an iPhone 5. I want an iPhone 5, therefore I have an iPhone 5. If you’re a person who loves quality accessories, then you will want the Mujjo iPhone sleeve as well. Seriously, I have to ask, who wouldn’t?
The Mujjo Originals Collection accessories also make great gifts. Everyone loves a quality gift and if you have someone in your life who has everything else, get her or him one of these beautiful and useful sleeves.
It’s frugal because it is a quality product that will last a very long time. Plus, it protects your valuable phone from damage during transport between uses. There’s nothing more frugal than protecting your investment in something you already have.
You’ll love the Mujjo iPhone sleeve at any price. It’s sleek, it’s fashion forward, it’s leather, and it’s an original. What more do you need or want?
Review: 9/10
Recommendation: It’s the nicest iPhone sleeve that I’ve seen and if you like using your phone without being wrapped up in a rubber case, then this is the ultimate accessory for you.
The iProp Universal Tablet Stand: The Return of the Bean Bag (Review)
 iProp Universal Tablet Stand
iProp
Dockem
$29.99 Retail, $29.99 Amazon (Prime qualified).
When I first heard of the iProp Universal Tablet Stand (iProp), I didn’t know what to think. I have seen other stands and, in fact, I have one that is a bit awkward to use and only works on rigid surfaces. But the iProp is cool in that it can sit comfortably on just about any surface including laps, tables, beds, chairs, floors, and carpet, because it conforms to the surface with its “bean bag” construction. And who doesn’t love bean bag stuff?
The iProp does its job well. In my house, we have iPhones, iPads, and iPad minis and they all work very well with the iProp. My daughter Maria loves the iProp and uses it for reading and working with her iPad mini for everything except video games. Apparently you need to hold the iPad for that.
The iProp has several clever features but our favorite is that you can stash your earbuds and power cable into the zipper pocket for safe keeping and handy access because you don’t want to disturb others while you watch YouTube videos. And you certainly don’t want to run low on power during the all-important Minecraft world creation.
I like to use the iProp to hold my iPad while using my Apple Bluetooth Keyboard. It works much better than the aforementioned rigid stand. I can use the iProp up close and it’s the perfect height to avoid neck strain during my long hours of article writing. The iProp makes writing on the iPad pleasant.
 The iProp currently is available in two colors: Silver (Light Gray) and Black. It is lightweight at just 7.4 ounces and its small footprint (5.9″ x 7.1″ x 5.9″) makes it easy to carry or pack.
Although I’m not sure why, but the plastic tablet rest/holder detaches from the rest of the unit with snaps. Perhaps it does so for convenience if you should need to wash the iProp or for more compact packing. But, in any case, it’s there as an added feature if you should need to separate the two pieces.
The iProp adjusts to minimize glare from your tablet and to accommodate your optimum viewing angle. Just mash it around like you would any bean bag type product until you’re satisfied. You’ll find the iProp stable and comfortable to use no matter how picky you are.
From a quality perspective, the iProp is very well made. I’m impressed with the construction and apparent durability. The product feels good in your hands and is something that you’d be proud to use in public settings such as lunch, bookstores, presentations, seminars, group meetings, or at home. This product will outlast many generations of iPads.
I can honestly recommend the iProp as a phone or tablet accessory. I use it in the kitchen to hold my iPad when I’m on allrecipes.com concocting a new creation for my family.
I love the iProp and so does my daughter who will probably take it to her room and never allow me to touch it again.
 The iProp is frugal because you will only need this one product to hold your tablet or phone, regardless of manufacturer. The iProp is compatible with Apple products, Androids, the Microsoft Surface tablet, and all mobile phones.
Maria’s Review: 10/10
My Review: 9/10
Recommendation: If you need a tablet or phone stand, get the iProp.
Rocksteady XS 1.5 with Speakerphone: First Impressions
 Rocksteady XS 1.5 bluetooth portable speaker with Speakerphone.
Killer Concepts, LLC.
$89.99
Question: What has the exact dimensions of the Rocksteady XS portable bluetooth stereo speaker but with even more cool features?
Answer: The Rocksteady XS 1.5 with Speakerphone.
And if I told you that the new Rocksteady XS with Speakerphone has jawdropping sound, you’d have to believe me. After I paired the new XS with my iPhone 5, I turned on my music to test it for the first time. It was one of those “unboxing” experiences that I didn’t record with video. Thankfully so. The queued song just happened to be a classic recording of Iron Butterfly‘s “In-A-Gadda-Da-Vida” and the first few notes of the intro made me jump and I almost dropped my iPhone. Jawdropping (or phonedropping) is a good description of that experience. My heart was still pounding a few minutes later when the song switched to Flyleaf’s hard-hitting “All Around Me.”
My kids, who are all on summertime vampire slumber hours, all three hit my office door at the same time to find out what the heck was going on. When I showed them the new XS and the fact that I could receive phone calls on it, they all responded, “Cool.” They also looked as if I had just run over their iPhones in the process. (They obviously wanted me to tell them it was for one or more of them) I waved them away while I continued my play–, ahem, research with the new XS.
Ordinarily my kids and my wife all make fun of me and my tech gadgetry. When I showed my wife the Speakerphone feature of the new XS, she picked up the XS and started walking away with it. “Hey, I’m not done with that. I’m writing a review.”
She returned it to me albeit reluctantly. I also told her that the new XS isn’t exclusive to my phone or a single device anymore. You can bluetooth connect two devices simultaneously and, like my Nissan Cube, the new XS remembers the last four devices paired to it for easy connection later.
The new Rocksteady XS with Speakerphone’s other notable features:
Battery Life: >10 hours
Distortion Free > 85dB
Charge USB devices with the USB port
3.5mm Line in music playback
USB stick music playback
Bluetooth streaming music playback
Control music and phone from phone or XS
Bluetooth 3.0 and no pairing PIN
Tough all-aluminum case
Replaceable rechargeable Lithium ion batteries
Longer, higher quality cables (1m USB and 1.2m 3.5mm cable)
And one notable feature that they forgot to tell me about in the literature: Killer sound. Of course I understand that marketing people don’t use phrases like “freakin’ killer” or “blow you away” but wow, just wow. You have to hear it to believe it.
OK, what they did say about the sound quality is this: Proprietary air channels inside to augment the sound range and volume using patent pending air channeling and membrane technology.
Uh, yeah, that’s what I meant by “blow you away” quality. I just didn’t get all geeky with it.
The sound grabs you by the throat and pounds your head. That’s a better way of saying it. And it’s not just the volume, which is important but the clarity and quality of the sound is unreal. I’m glad I don’t understand the magic behind it because I like it. I’m no sound expert but the tone is excellent and I never got any distortion even at the highest setting.
The sheer volume and clarity on this little device is one that could quite possibly drive your neighbors crazy–and if you knew my neighbors, you’d know that’s a pretty short drive.
For the highest setting, I turned my phone’s volume all the way up and then tapped the XS volume + button several times to get the most from it.
Remember the days when party DJs used to bring all that crap with them? Well, frankly, unless you have a huge auditorium, you could start your own DJ business with a phone and two or three of these new XSs. The XS would be really cool for street musicians too who don’t want to lug around a bunch of sound equipment. If I were a street musician, I’d use two of them and I’d have all the attention–even in Las Vegas, where you’ll have street performer overload after a stroll on the strip.
I compared the sound on this little device to my expensive HD TV and there’s no comparison. (I’m going to figure out a way to play my TV through it and give you an update).
The whole point of any sound device is to give you a great listening experience. The Rocksteady XS with Speakerphone will do just that. You’ll be impressed.
But its other features make it a “must have” pairing with your phone or other bluetooth-capable audio devices.
A note about the speakerphone feature. The microphone is located near the Pause/Stop button on the top of the XS. Apparently it’s pretty sensitive because my wife who answered my phone with it was standing about six or more feet away after she pressed the Pause/Stop/Answer/Hangup button. We could both hear each other just fine through it. I think the capability to receive calls through the XS is my personal favorite feature. Well, other than the incredible sound quality, it’s my favorite feature.
The Rocksteady XS 1.5 with Speakerphone is a great value. It is a stand-out in its class and you’ll be happy with it. As of this writing, Amazon.com is out of stock on it, so that should tell you something. It tells me that you’ll be lucky to find one and you should grab it when you do.
My highest recommendation and highest rating: 10/10
In the, “Why is it Frugal?” category, the Rocksteady XS 1.5 with Speakerphone is frugal because it does everything you want it to. In other words, it is the single best device to pair with your phone that I’ve seen in a while. It is more than just a portable speaker, it’s a companion. It’s what you need and its features make it a bargain.
Making it Move with MotionComposer for Windows (Review)
 MotionComposer 1.0.14
Aquafadas
$149 US
MotionComposer for Windows
Also available in Mac format.
MotionComposer is a desktop application that allows you to create Flash or HTML5 animations for your website or animated ebooks for iPad and iPhone. MotionComposer is a relatively complex program that has just about every bell and whistle imaginable for creating dynamic content. I like the application. It’s too bad that I’m either not smart enough to create really good content or I haven’t spent enough time with it to do so.
I’m too embarrassed to post my creation for you to see but I can see how easy it is for someone who can spend time with the application to learn its ways and means.
It’s a very powerful program that I would compare to Adobe Photoshop in flexibility, power, capability, support, and complexity. Don’t mistake the application’s complexity for complexity of use. The program is complex but its operation is simple.
The user interface is clean and enjoyable to use. It is responsive and does exactly what you tell it to do. MotionComposer is one of those programs that you could use to create an interactive training device, a dynamic website, an animated ebook, magazines, newspapers or just about any animated digital content that you can imagine. I’d love to have expert knowledge of it but I may never gain that kind of competence with the application on my own.
MotionComposer’s website makes the following claims:
MotionComposer makes your life easy
- No coding required.
- A clear user interface lets you create beautiful animations effortlessly.
- Publish in Flash® and HTML5 in a single step.
- Publish content to any computer, smartphone, and tablet, including iPhone and iPad.
- Optimized HTML5 code ensures the best performance of your content on iPhone and iPad.
I’d have to agree. Even my very poorly conceived animation worked very well. If you’re a graphic artist, designer, web administrator, ebook creator, or creative person in general, you’ll love it. And for $149, it’s easy on the wallet too. Seriously, these types of applications, if you’ve priced them, are far more expensive or you have to purchase add-ons or modules to do what this one does as is.
Creating content with MotionComposer reminds me a bit of creating a stop motion movie. You begin with a timeline and slides. From there, you add graphics or text and edit the transitions and movements of your objects. It’s great fun actually and not anywhere near as tedious as creating a stop motion movie.
The app features multiple transitions for elements, such as text fly-in, transitions between slides, audio capability, zoom and more. If you really want to see it in action, watch the demo video.
I have some good advice for you after working with this application for a few hours. First, if you’re a beginner with this kind of app, read the docs, watch the demo video and learn its capabilities before you experiment. It’s easy but it’s not child’s play. This is a professional application that requires mastery. If you’re a pro who’s coming at this from another similar application or from some other method, you’ll love it.
In all, I think the price plus performance rate this application at a solid 8.5 out of 10 for me. A company representative told me that there is a newer version coming soon that will knock your socks off. Frankly, I never liked socks anyway. I can’t wait. I hope they allow me to upgrade. This is one app that I’d love to master and use.
Rating: 8.5/10
Recommendation: Buy and Learn.
iStopMotion for iPad (Product Review)
iStopMotion for iPad
Boinx Software Ltd.
$9.99 iTunes Store
App for making stop motion and time lapse videos
Related product: iStopMotion Remote Camera (Free)
I was pretty excited when asked to review iStopMotion for iPad, since I’ve been a fan of stop motion video and claymation since I was a kid. I remember watching Gumby, Davey and Goliath, and all of those holiday claymation shows and loving them. I have always wanted to make my own stopmotion movies but never knew how. Plus, it takes a LOT of patience to make them, even with a cool app like iStopMotion for iPad.
And iStopMotion for iPad is cool. I like it. The really cool part about it is that you can install iStopMotion Remote Camera for your iPhone and use it as your camera and save your photos to your iPad without having to do anything more than clicking the shutter button.
I like the onion skinning feature too. This allows you to see where you’ve been on the previous shot so that you can move your objects a small amount so that the movie doesn’t look jumpy.
Over on your iPad, iStopMotion assembles your snaps into a stop motion video for you. One word of caution here, though. Don’t assume, like I did, that iStopMotion will allow you to manipulate your movie a great deal–it doesn’t. Now, if you’re a Mac owner and you also have iStopMotion installed, you might be able to do more but all you can do with the iStopMotion for iPad app is delete the current frame, delete all frames, duplicate the current frame, or reverse the order of all the frames.
Hopefully in the future, Boinx will give us more editing features with the app. One I would love to see is the ability to export the video into individual frames. I need this feature because, like most filmmakers, I do not necessarily create in linear order. I need the ability to move frames.
I created a short video but didn’t realize the limitations so it won’t be posted here. Sorry. It was basically two hours wasted because I wasn’t aware. I guess I didn’t read the fine print.
That said, I think that if you create your movies in linear fashion, meaning you create your video from the beginning and work through to the end, then you’re fine. Unfortunately, I was going to work my magic in “Post.”
The app does exactly what it should otherwise. You can create all kinds of really cool stop motion movies, claymation animations, text-based animations and more. Don’t let my ignorance of the app cloud your decision to use it or not. I think it’s a very cool app and having the ability to shoot with the far more agile iPhone is the absolute coolest feature.
For my studio setup, I used an 18″x24″ whiteboard, an iPhone 4, an iPad 4, a tripod and phone holder, and a dimmable, fluorescent ring light.
You can share and upload your movies via the app to Dropbox, YouTube, or save to the Camera Roll.
I think to get a full appreciation out of this app and what you can do with it, you’d have to own a Mac equipped with iStopMotion or maybe iMovie, although I’m not 100 percent sure that the movies are editable in iMovie. I don’t own one, unfortunately.
So, in a very rare move, I’m offering two different review results for this app.
9/10 for Mac owners who also own iStopMotion.
6/10 for everyone else.
 Techopedia
- An error has occurred; the feed is probably down. Try again later.
Datamation
- Google and NextEra Strike AI-Powered Grid Deal
- NYT Sues Perplexity AI in Copyright Conflict
- Cloudflare Outage Affects Major Websites
- OpenAI Forces AI to Confess Its Lies
- OpenAI Declares Code Red as Google’s Gemini 3 Threatens ChatGPT
- Coupang Breach Exposes 33.7M South Koreans’ Data
- ChatGPT Celebrates Third Anniversary
- Asahi Group Reveals Findings of Cyberattack
- OpenAI Discloses Mixpanel Security Incident Affecting Some API Users
- Firefox Zero-Day Flaw Exposed 180M Users


You must be logged in to post a comment.